Introduction


In this article I will explain how I quickly created a salt level sensor for my water softener using an HC-SR04 Ultrasonic Distance Sensor and a Wemos D1 mini . The inspiration was provided by DrZzs during one of his live streams. Since I wanted a smart device and upgrading mine would cost me around 150€ I decided I would try to do it myself. I will illustrate two examples on how to display the data. One in the actual height of salt left in the container and another in percentage.
Material list
So what do you actually need?
First of all, a water softener, a Wemos D1 mini, a HC-SR04 and a 4 wire cable to connect the HC-SR04 to the D1 and a mini USB power supply
Main Components

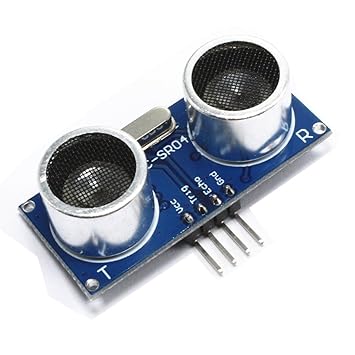
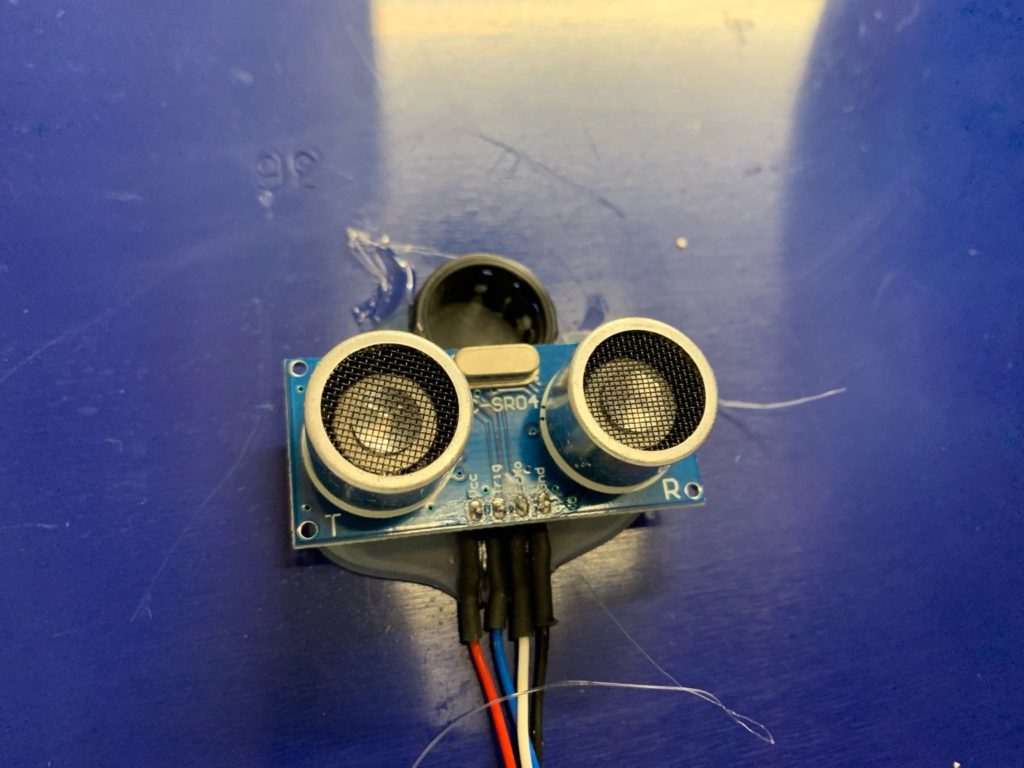
HC-SR04 Ultrasonic Distance Sensor
The ultrasonic sensor determines distance by using sonar, which means no direct contact is required for measurements
Additionally you will need
- a 4 wire cable (as long as required)
- A 5V power supply for the D1 mini. (A mini usb phone charger is more than enough)
- a mini USB cable (for flashing)
Additional tools and hardware
For this project soldering is required, here is a list of some additional tools you could find handy
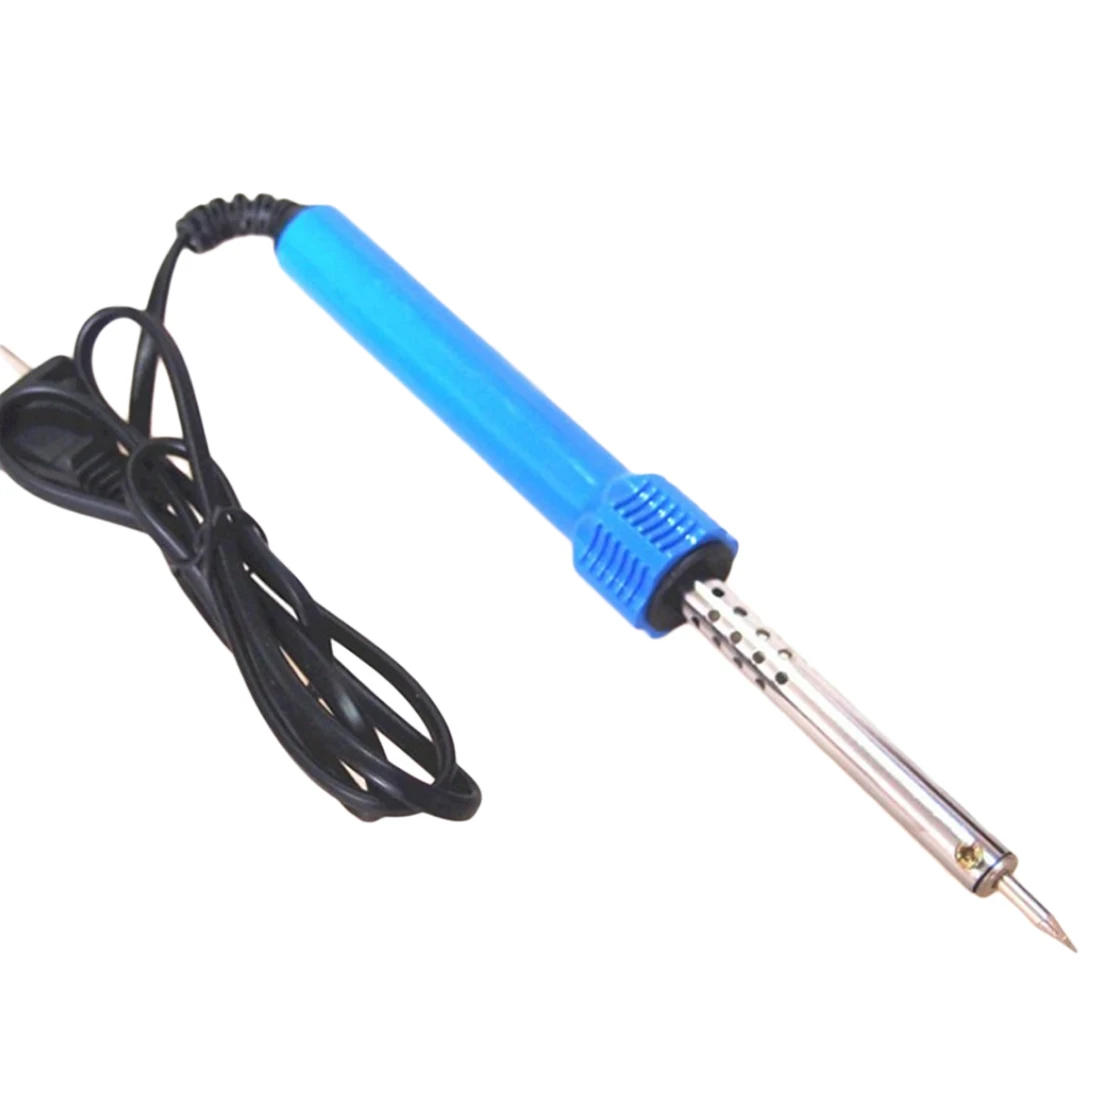
A soldering iron is a must for every DIYer
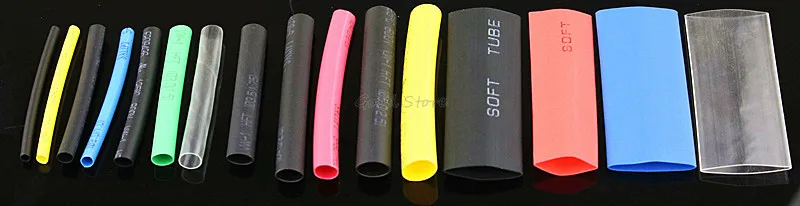
Shrink tubes aren’t required but they will help you to avoid short-circuits and will make your project look a lot tidier … bonus: they will hide soldering defects.

Depending where you will place your D1 a case might come in handy. I’ve hidden mine in the garage motor. If you would like to place it somewhere else this is the way to make it look tidy
Software
I’ve used the following software to complete the project:
Flashing the firmware on the D1 mini
As mentioned above I used ESPhome. If you do not know ESPHome and have no clue what I’m talking about, well, head up to their website. They have it well explained. So please do take the time to read the guide.
- Getting Started with ESPHome (for Hass.io users)
Getting Started with ESPHome (when not on Hass.io)
For the rest of this guide, I’m going to assume you are running Hass.io. However, the ESPHome getting started guide for non-Hass.io users is extremely detailed, and you should be able to adapt easily.
Preparing the firmware
This part is pretty straightforward I have prepared the code you will only have to adapt the value we will subtract from ( it is the height from the salt container from where the sensor will be placed to the bottom )
Things to take into account:
Since we are going to measure from the top down the measured value will increase as the salt drops. In order to have a decreasing value we will take the distance from the sensor to the bottom, of the salt container and subtract the (by the sensor) measured distance from the previously measured container height.
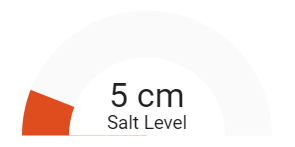
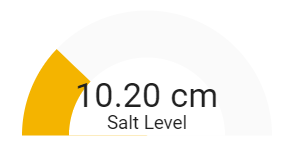
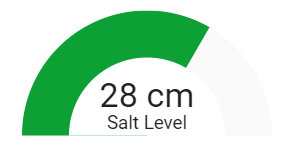
Another thing I have done, and that is up to you, is to convert the measured distance in meters to centimeters since my salt container is only 46 cm high.
You can also convert from metric to imperial.
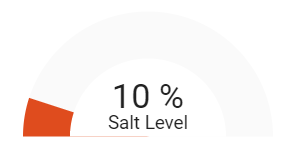
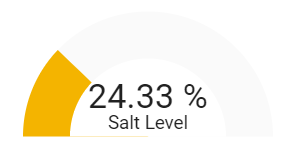
As some people prefer to have percentage values, I also added an example for percentages where you take the total distance(t), subtract the measured distance(x), multiply it by 100 and divide it by the total
((Measured) * 100) / (Total Dsitance)
in my case: ((0.42-x)*100)* (100 / (0.42 * 100)) = 24.28%
or
(0.42 -x) * (100/0.42) = 24.28%
The actual code
DO NOT USE PIN D4 !!! the D1 mini won’t boot!
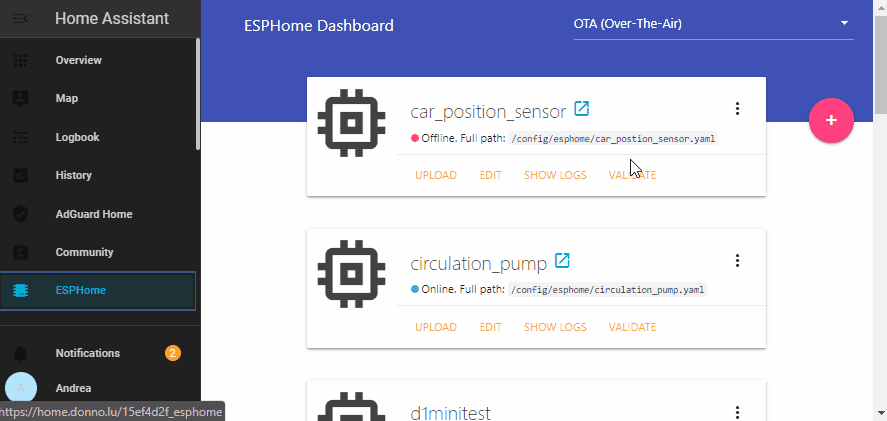
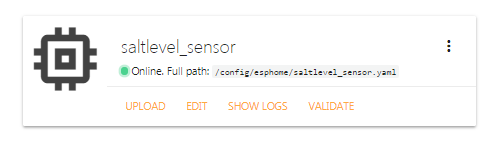
Create a file called salt_level_sensor.yaml; for Hass.io users, create the file in the /config/esphomefolder, so you end up with the file: /config/esphome/ salt_level_sensor.yaml.
Next, add the following contents to the file:
The above snippet shows an ESPHome project file in the YAML format.
On lines 9 & 10, make sure to set your WiFi details or else you might end up with failure. Save the file and open up the ESPHome web interface; The Car_position_sensor project should appear!
Save the file and open up the ESPHome web interface; The Car_position_sensor project should appear!
Now validate and Downlaod the bin as shownin the example below.
Uploading the firmware to the D1 mini
I won’t explain how to flash the firmware to the D1 mini since you can find all you need in the following article:
https://adonno.com/car-presence-position-detection/#10-uploading-the-firmware-to-the-d1-mini
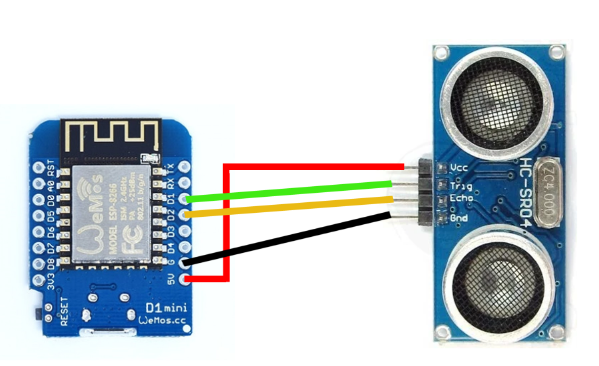
Wiring up the D1 mini and the sensor
Make sure your D1 mini is disconnected from any power source during this step!
The wiring is pretty straight Forward we’ll use D1 and D2 for trigger and echo. The HC-SR04 needs to be power so we’ll give it 5V (VCC) and GND
Soldering done? Good let’s carry on
Now that you have soldered all the sensors and have verified there is no short-circuit, it’s time to test if all is working right and you have wired the pin-outs correctly.
Connect your D1 mini to a power source and verify it is online in ESPHome.
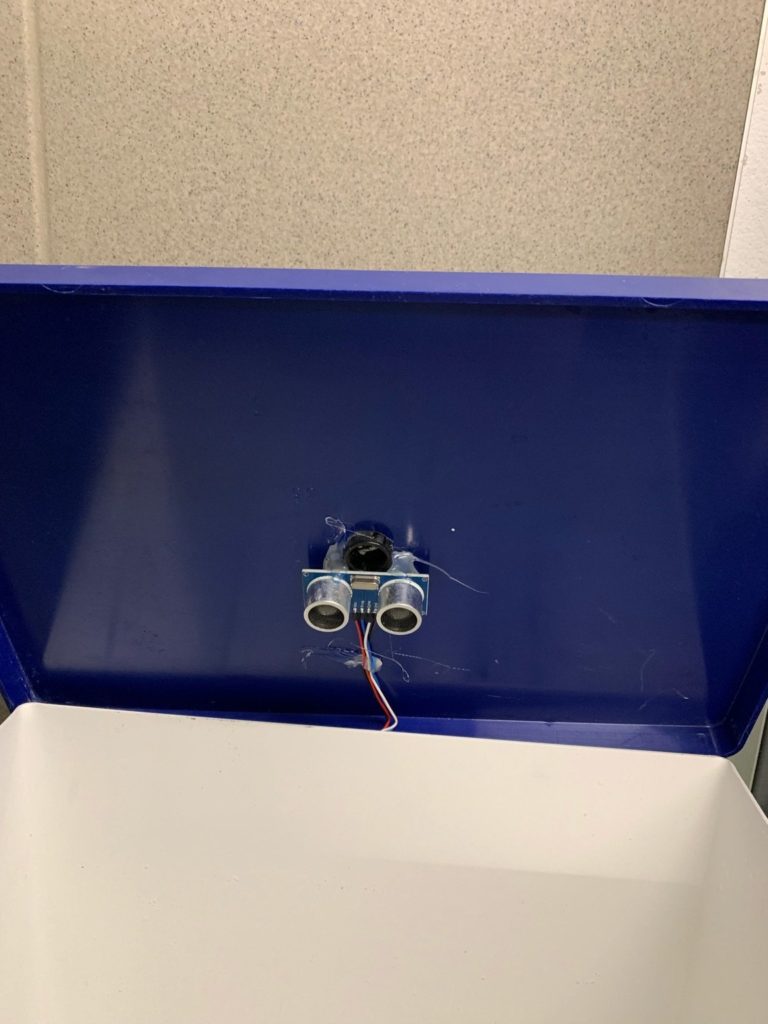
Installing the sensor in the salt/brine tank.
This part is totally up to you. I chose to place my sensor inside the thank and hold it in place with some hot glue the D1 mini is in my rack since I’ve added temperature sensors as well (which i haven’t explained here). DrZzs drilled a hole into the lid and placed it atop. You can then place the D1 mini on top of the lid and cover it so that it’s protected from outside factors like dust etc.
Integrating the sensor in Home Assistant
Now this is really easy thank to the efforts the Home Assistant dev team has done. In Home Assistant, go to: Configuration > Integrations > the sensor should appear at the top. Follow the steps below to integrate it in Home Assistant
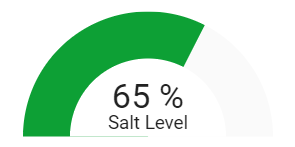
Lovelace-UI
In order to have this view you will need the gauge card
copy the following code in your view
And you are done
Useful Information
In case of any question, find me on Discord or on Twitter.
You can find a dedicated Discord Server for any ESPHome related question or if you have questions about the drivers for the D1 mini
If you have issues with the community add-ons, you might find help on their discord server.
If you liked this article, do not hesitate to share it
I run mostly on coffee so, if you enjoy my work, and if you would like to support me you can buy me a coffee

Hello thank you for your tutorial.
Can you post how to add the temperature and humity sensor + configs?
I want to mesure the H&T of my garage with the same D1.
Thank you for your help
I sorry for the late reply, i will try to give you the code for that as well I’ve been really busy lately
I will recommend use one of this instead (Xiaomi Mijia Thermometer 2 Bluetooth-compatible Smart Home Temperature Humidity Sensor with LCD Screen Digital Moisture) and remplace the D1-Mini 8266 with an D1 Mini ESP32 ESP-32 WiFi+Bluetooth!!!! that will works great!!!
look at this: https://omarghader.github.io/how-to-monitor-your-home-temperature-with-esp32-and-xiaomi-mijia-using-esphome/
@IVAN, please follow
https://esphome.io/components/sensor/dht.html
for detailed explication about humidity and temperature.
@Adonno, nice tut, thx for sharing. I’m tring to build this up with infra red distance sensor GP2Y0A21YK, find mor details about it on
https://home.roboticlab.eu/en/examples/sensor/ir_distance.
2 reasons for making things more complicated with ADC etc.
– ultrasonic trigger/echo is ok when you measure 90 derees on a surface in open spaces put a hassle when you apply it in a closed box and other angles (the lid of my water softener is not ecactly horizontal, nasty to physicaly install to achieve the 90°). The echo will tend to bring back random values which would require averiging, filtering to approch. That’s not realy a nice measaring method. The idea of car parking sensors was brought up since they are built to handle salty environments, but there are non widly spred and easy to buy sensors at cheap price hence that’s a show stopper.
– ir sensers are closed by lenses and more resistant to corrosion, so more durable in that specific environment (maybe requires cleaning the lenses every time filling up salt). Price for the sensors is about the same, ir sensors are slightly more exprensive but the difference is hardly hurting.
ir senseor has max output 3.1 V so I’ll just use three 10kohm resistors in line as spliter and get max 1.03V from between 2nd and 3rd resistor and feed this to ADC of the esp and go on with
https://esphome.io/components/sensor/adc.html
It will require calibration with filters and lambas, I’ll follow up when I got it up and running.
Hey , do let me know how it worked out , I’ve been busy a lot recently and I have a big ongoing diy project
Hey Adonno, hi there,
A long time has passed, I keep waiting for my IR sensor and things turn out that it won’t come here in reachable future. Tired of waiting and thinking about how accurate this measurement has to be I made the compromise of using ultrasonic sensor which I found grabbing in my archive. I reconciled a lot of you ideas, made my installation different though with a small case, al parts exchangeable.
I’d like to suggest a different way of calculating the salt level in percents, let me explain quickly why.
For you, 100 % salt level is from the bottom of the container to the sensor, eg. 100 % salt level will touch your sensor. Are you sure this reflects the situation as it really is, do you really drawn your sensor on the saltwater when you fill it up? Most certainly not, you will leave a grace distance, right? Here my lambda with grace distance 10cm:
“`yaml
### Calculate level in percents ###
# Sensor comes from factory with unit of measurement meters
# The container height (sensor to bottom) => 72cm, 0.72m
# Subtract measured value from the container height => difference is the salt level
# 100 % salt level is the container height minus 0.1 meters since nobody will drawn the sensor at full salt level
# divide salt level through container height minus 0.1, then multiply result with 100 to achieve percents
– lambda: !lambda |-
return (0.72-x)/(0.72-0.1)*100;
“`
Greets and thanks again for spreading the idea
Hello ANDILGE/ADONO,
I’m about to undertake this project. I know this posting is a couple of years old. I’m hoping Andilge or Adono see it or someone else in the know can confirm the yaml code as being;
“`
### Calculate level in percents ###
# Sensor comes from factory with unit of measurement meters
# The container height (sensor to bottom) => 72cm, 0.72m
# Subtract measured value from the container height => difference is the salt level
# 100 % salt level is the container height minus 0.1 meters since nobody will drawn the sensor at full salt level
# divide salt level through container height minus 0.1, then multiply result with 100 to achieve percent’s### Calculate level in percents ###
# Sensor comes from factory with unit of measurement meters
# The container height (sensor to bottom) => 72cm, 0.72m
# Subtract measured value from the container height => difference is the salt level
# 100 % salt level is the container height minus 0.1 meters since nobody will drawn the sensor at full salt level
# divide salt level through container height minus 0.1, then multiply result with 100 to achieve percent’s
– lambda: !lambda |- return (0.72-x)/(0.72-0.1)*100;
“`
I’m most interested in correct formatting of the -lambda line. Are all spaces and characters correct.
Regards
Robert
Thanks so much for writing this up – I’ve just set it up and it works perfectly!
Thank you for the tutorial. I have been able to measure but only when I use the same name of wifi ssid from hassio. I have a wifi extender that creates a different wifi ssid (and I wolud like to keep a different name for other reasons) and when I connect the ESP to the wifi from the extender I can see that is sending the values from the log but in the hassio lovelace appears as unavailable. I have other elements (meross plugs) connected to the wifi extender and they work without issues. I would appreciate if you could help me!
Have you tried to re-add it on HA?
maybe add it via its ip address ?
Thanks again, I have deleted the integration, uploaded via OTA, restarted hassio and is working ok!
Hello Goodnight. I have followed his tutorial and I have problems, hassio tells me that N values are numerical and when I enter the Esphome log I see that it says [D] [ultrasonic.sensor: 026]: ‘Percentage Salt Level’ – Distance measurement timed out !
I am sorry but I do not follow the math of the project. The more I look at it the more confusing it is.
My tank…
From the ground to the sensor is 93 cm
From the ground to a completely 100% full tank is 81 cm so leaving a little room I usually fill it to 72 cm.
What would be my calculation. Based on using 72 in the formula (just filled tank to 72 cm) my level reads in home assistant 5.22 cm with a % of -61.12.
This is what I used
– lambda: return (0.72-x)*(100/0.42);
– lambda: return (0.72-x)*100;
Also though I am comfortable using metrics how would I convert to imperial.
Thanks so much, great project.
Even wrote an automation to remind me to fill the tank.
replace 0.42 with the height of your container. From the sensor to the bottom.
for me it looks like the following
lambda: return (101.6-x)*(100/101.6);
I am sorry but I do not follow the math of the project. The more I look at it the more confusing it is.
My tank…
From the ground to the sensor is 93 cm
From the ground to a completely 100% full tank is 81 cm so leaving a little room I usually fill it to 72 cm.
What would be my calculation. Based on using 72 in the formula (just filled tank to 72 cm) my level reads in home assistant 5.22 cm with a % of -61.12.
This is what I used
– lambda: return (0.72-x)*(100/0.42);
– lambda: return (0.72-x)*100;
Also though I am comfortable using metrics how would I convert to imperial.
Thanks so much, great project.
Even wrote an automation to remind me to fill the tank.
I have made the sensor but am trying to figure out the sensor calculations. I tried yours and the tried to follow the post from ANDILGE, but alas I am very confused. My tank from floor to top of sensor is 95cm. Filled salt level is 80cm. Thus a 15cm difference from the top of the sensor to the salt. Can you help me determine how I could use the formula. I took your formula and replaced it as follows – lambda: return (0.95-x)*(100/0.95); but I get some very strange results. Did I do this correctly?
Hi all, I tried to build this sensor, but I’m not getting back any values from ultrasonic sensor.
I checked and rechecked the wiring and all seem fine.
I measured with a multimeter the V exiing from from D1 Mini and entering on HC-SR04 sensor and it’s stable at 4,68V.
I measured the V entering at TRIG pin and it’s stable to 4,68 V…is it correct ?
Btw from ESPHome this is the log.
[19:01:31][D][ultrasonic.sensor:026]: ‘Saltlevel in cm’ – Distance measurement timed out!
[19:01:31][D][sensor:092]: ‘Saltlevel in cm’: Sending state nan cm with 2 decimals of accuracy
[19:01:35][D][ultrasonic.sensor:026]: ‘Saltlevel in percent’ – Distance measurement timed out!
[19:01:35][D][sensor:092]: ‘Saltlevel in percent’: Sending state nan % with 2 decimals of accuracy
I tried with two ultrasonic sensor (same model) sold by two different seller.
Good afternoon,
Hope anybody will read this comment after a few months of no reply’s.
I have used this tutorial to create my own salt level integration.
Everything works fine, only the sensor (cm and %) present outcome: “unknown”
Can somebody help me in the right direction where to solve this error?
ESP Home tells me i am online, and the YAML is validated.
Only change what i made was the WIFI information, and update ration changed from 6h to 1h.
This was so close to exactly what I was looking for but for monitoring the pellet level in my wood pellet stove. I took it all and made some changes to suit.
Thanks again for the tutorial and the ideas on how to achieve what I wanted.
This is perfect, have just completed and working great! Thank you!
One point to note for anyonoe wondering why cm/% sensors are unavailable but everything appears to be working – I *think* it doesn’t send a value until the END of the interval time (default 12 hours). I’ve amended mine to far more frequent (10 seconds) for testing and it works great. Once in place I have put it back down to a sensible interval (in my case 1 hour but I love data!).
A bit late to the party, but I also implemented this and the formula didn’t work for me at all, probably because my tank is a little different. My tank is 45cm in height and I fill it with blocks of salt, max 4 blocks as they come in a pack of 4 when ordering online. Having 4 blocks in my tank, the waterlevel is measured as 16cm. When there is no more salt in the tank, it still holds water and the waterlevel is then measured at 28cm. So I need the % to give me 0% when measure 28cm and 100% when measured 16cm.
I constructed the formula like this:
lambda: return ((x-0.28)/(0.28-0.16)) * -100;
Can this be used?
https://www.parallax.com/product/ping-ultrasonic-distance-sensor/
I had one laying around and thought I’d give it a try
It only has one pin for sending and receiving. I tried to change the yaml to that one pin, but I’m only getting -nan as a response.
Doesn’t look like it.
This is the list of supported distance sensors.
https://esphome.io/index.html#distance
Due to a breaking change which flags pin reuse you need to update the code for both platform sensors like this:
– platform: ultrasonic
trigger_pin:
number: D1
allow_other_uses: true
echo_pin:
number: D2
allow_other_uses: true