This is my first article please do not hesitate to leave any feedback positive or negative. It will help me improve over time.
Wouldn’t it be nice to instantly see if you forgot your car outside when going to bed or check if there is space in the garage to fit your car? Well in my case having a garage where 2 cars go one behind another, brings an issue since I would like to know if there is room to fit the car of maybe I have to leave the car outside while arriving home for cheap?
That is how my journey with this project began.
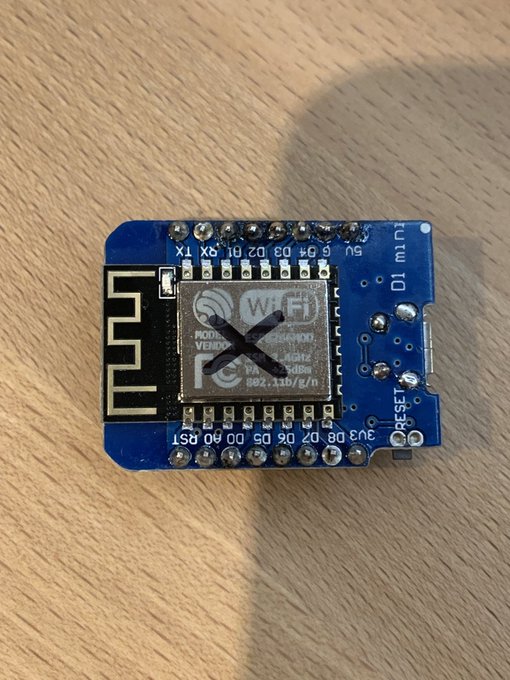
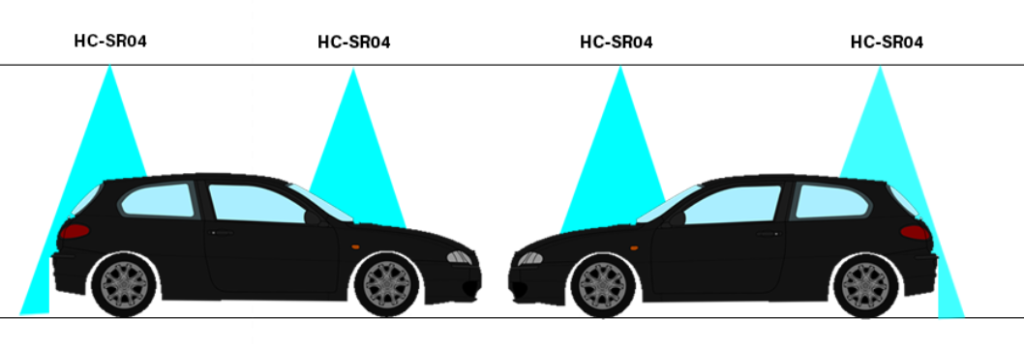
Inspired by the salt-level sensor project I have on another post, I used the HC-SR04 Ultrasonic Distance Sensor. Actually 4 of them, combined with a Wemos D1 mini running ESPHome.
Materials List
So what do you actually need?
Depending on your garage configuration your needs may vary . In this case let’s focus first on my configuration. I used one Wemos D1 mini, 4 HC-SR04 and 6 meters of cat5 cable
Main Components

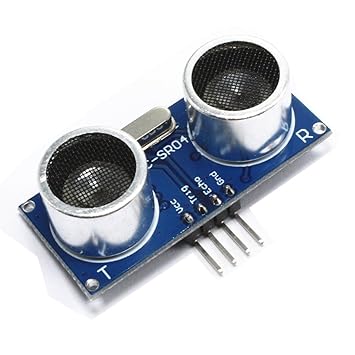
HC-SR04 Ultrasonic Distance Sensor
The ultrasonic sensor determines distance by using sonar, which means no direct contact is required for measurements
Additionally you will need
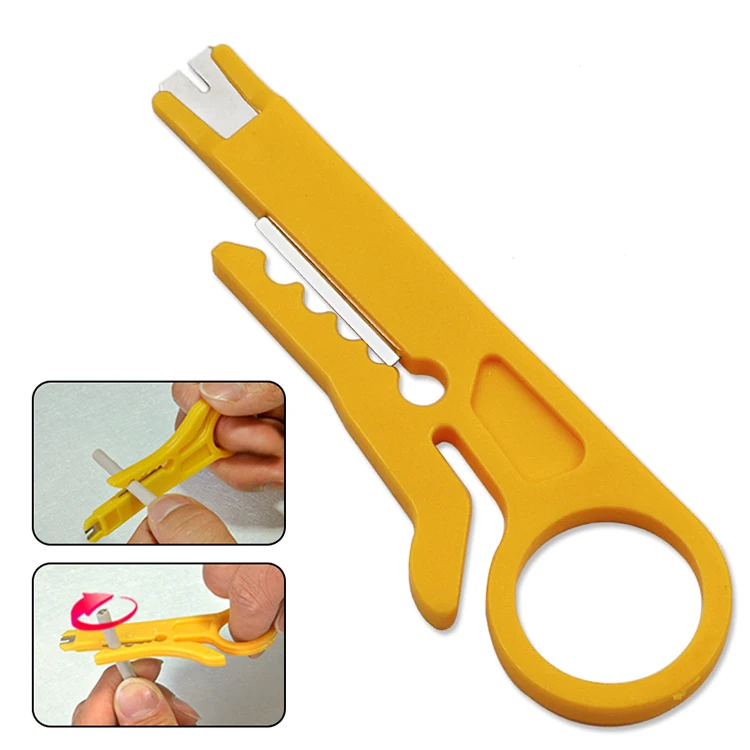
- Some wires to connect the sensor to the D1 mini. I preferred using a cat5 cable and splicing it into it but that is up to you. You can also use a 4 wire cable for every sensor.
- A 5V power supply for the D1 mini. (A mini usb phone charger is more than enough)
- a mini USB cable (for flashing)
Additional tools and hardware
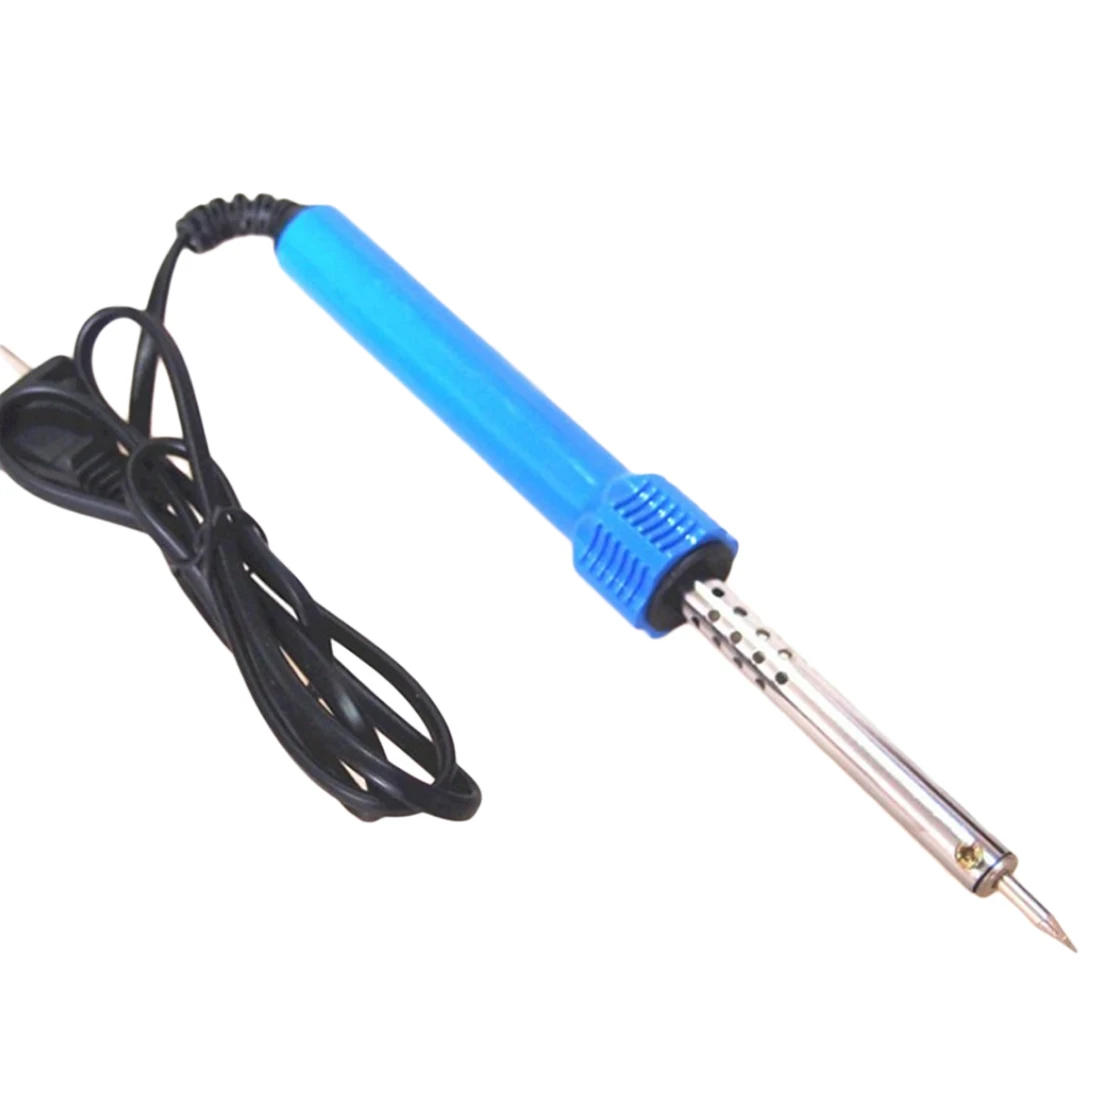
For this project soldering is required, here is a list of some additional tools you could find handy
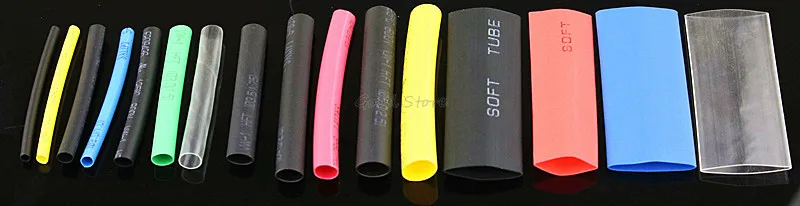
Shrink tubes aren’t required but they will help you to avoid short-circuits and will make your project look a lot tidier … bonus: they will hide soldering defects.

Depending where you will place your D1 a case might come in handy. I’ve hidden mine in the garage motor. If you would like to place it somewhere else this is the way to make it look tidy
Software
I’ve used the following software to complete the project:
Since this is a Home Assistant based site you would come to the obvious conclusion that Home Assistant is required. ESPHome is my firmware to run on my boards, you can also use tasmota but I have not tried that as of yet.
Alright then, let’s get started
Can the D1 mini cope with 4 sensors ?
That was the question I asked myself. There was only one way to know for sure: test it.
I pulled out a breadboard, some Dupont wires and quickly slapped it all together to get to this beauty :
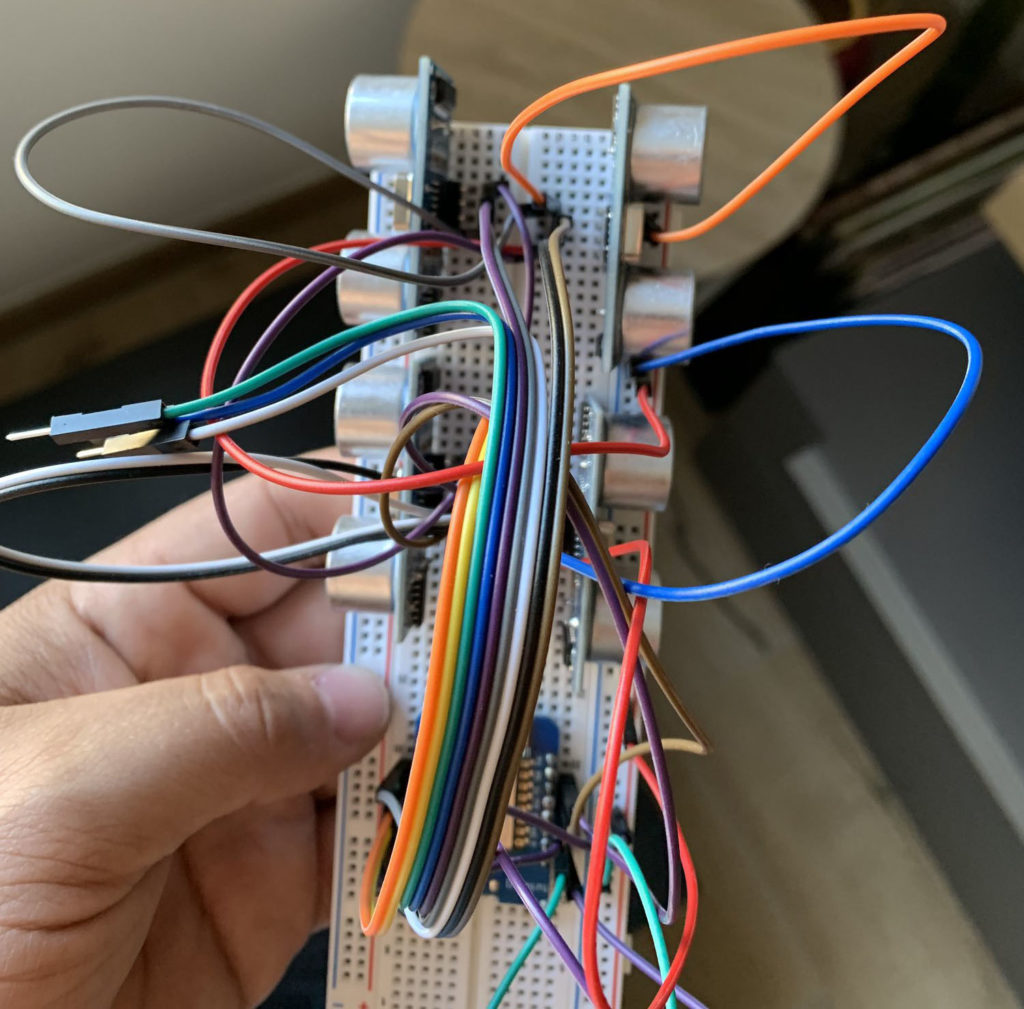
I connected each sensor one by one and added them to the esophome.yaml until they were all connected and checked they were reporting the correct values. So let’s get serious now
Flashing the firmware on the D1 mini
As mentioned above I used ESPhome. If you do not know ESPHome and have no clue what I’m talking about, well, head up to their website. They have it well explained. So please do take the time to read the guide.
- Getting Started with ESPHome (for Hass.io users)
Getting Started with ESPHome (when not on Hass.io)
For the rest of this guide, I’m going to assume you are running Hass.io. However, the ESPHome getting started guide for non-Hass.io users is extremely detailed, and you should be able to adapt easily.
Preparing the firmware
This part will depend a lot of how you are going to setup and install your sensors. This example is based on my setup and you can modify it as you see fit.
Things to take into account:
The sensors are supposed to be precise up to 4 meters. However I’ve found their best working distance is from 0 to 200 cm. Any further and you might get false values. I for my hand can work with these false values and will explain that a little bit further.
Since I wanted to measure the car’s height I had to subtract the measured value to the overall distance from the floor to the distance
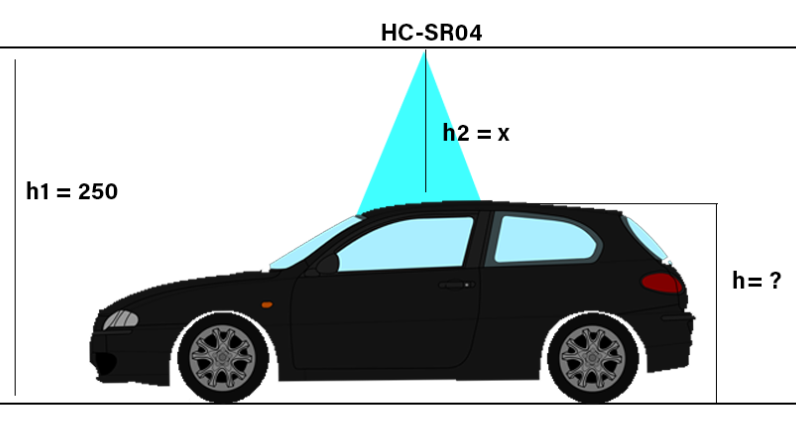
Let’s assume we have a ceiling height of 250 cm and we would like to know the height of the car:
height of the car = 250cm – x
So if h2 would be 100 cm we would get :
h = 250cm – 100cm
h = 150cm
In ESPHome there are so called filters that allow you to modify the calculated value before it gets sent to Home Assistant
The actual code
DO NOT USE PIN D4 !!! the D1 mini won’t boot!
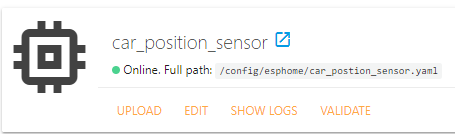
Create a file called car_position_sensor.yaml; for Hass.io users, create the file in the /config/esphomefolder, so you end up with the file: /config/esphome/car_position_sensor.yaml.
Next, add the following contents to the file:
The above snippet shows an ESPHome project file in the YAML format.
The pins D0 to D8 may vary depending on how you will solder your sensors.
You will also have to measure the distance between the sensor and the floor for each sensor in order to input the correct value for their correct lambda calculations.
On lines 9 & 10, make sure to set your WiFi details or else you might end up with failure. Save the file and open up the ESPHome web interface; The Car_position_sensor project should appear!
Uploading the firmware to the D1 mini
In order to upload the firmware to the D1 mini, we will make use of the usb port provided on the device.
You will need the driver for the USB to serial controller to be recognized. For which most of the chip-sets it can be downloaded via the link below
https://wiki.wemos.cc/downloads
Should your D1 not work with provided drivers please refer to the useful information section.
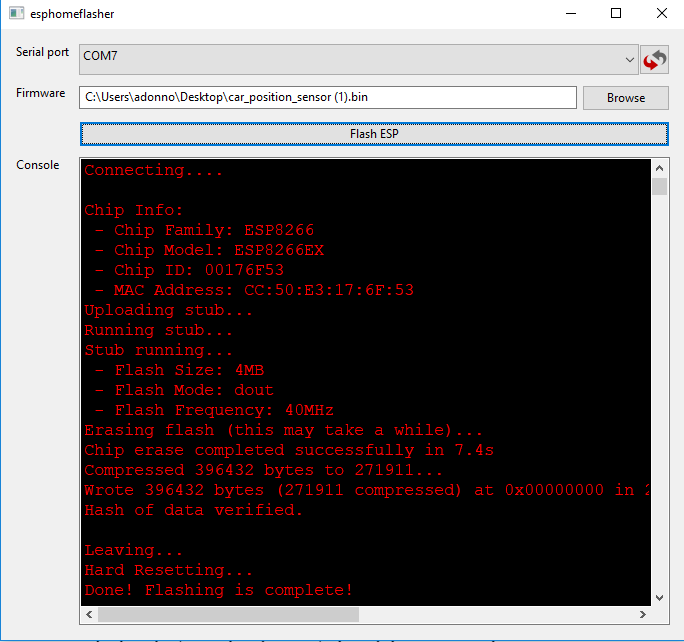
Plug the USB cable into your PC and the mini USB into the D1 mini. Now start the ESPHome flasher tool. Select the available serial port, and load the car_position_sensor.bin file by clicking the “Browse” button. Start the flash procedure by clicking the “Flash ESP” button. The console shows you the progress and tells you when it finishes.
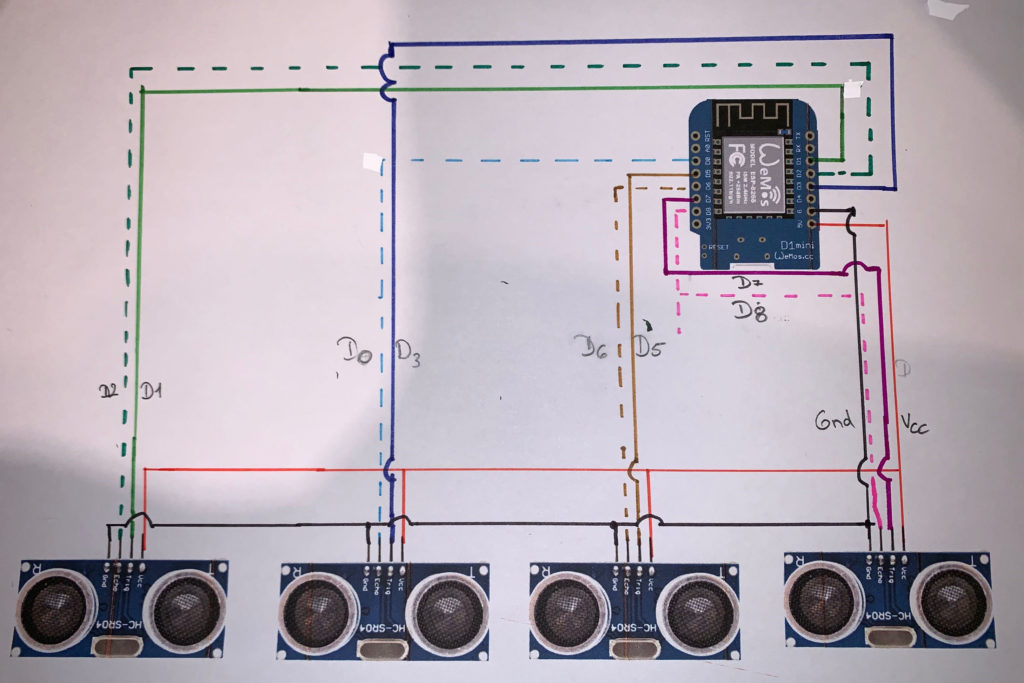
Wiring up the D1 mini and the sensors
Make sure your D1 mini is disconnected from any power source during this step!
DO NOT USE PIN D4 !!! the D1 mini won’t boot!
Next we will start wiring up the devices. I have them separated 1.80 m of each other. That is enough so that a car is always below 2 sensors at least and in my case that is required (I’ll explain that later).
Since I used a cat 5 cable I had 3 sensors settled. I used the Red-Redwhite wire pair for VCC and GND and then used another wire pair for each sensor. The front one is so close that I just connected it directly with a 4-wire cable.
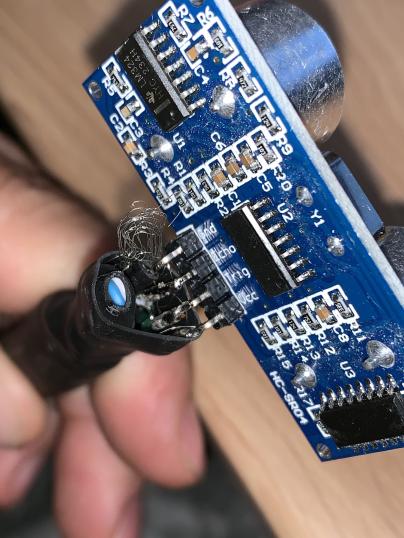
The most important part, and where patience is required, is the soldering. Please verify multiple times that there is no short-circuit on one of your sensors or your D1 mini will die. The pictures below show what happens if you are sloppy. Anyway, let’s avoid calling it a failure since I have learned my lesson.
Soldering done? Good let’s carry on
Now that you have soldered all the sensors and have verified there is no short-circuit, it’s time to test if all is working right and you have wired the pin-outs correctly.
Connect your D1 mini to a power source and verify it is online in ESPHome.
If the sensor isn’t online, verify your config and try flashing it again. If it should still fail please revert to the “useful information” section
Installing the sensors in the garage
So now that the sensor is working in ESPHome, it is time to install it in your garage. Now this is totally up to you, however since i wanted to avoid false positives, and identify what car is turned in which direction. This meant, I have to have the car under 2 sensors at all time at least. Try to keep them centered as well

Integrating the sensor in Home Assistant
Now this is really easy thank to the efforts the Home Assistant dev team has done. In Home Assistant, go to: Configuration > Integrations > the sensor should appear at the top. Follow the steps below to integrate it in Home Assistant
Prepping for lovelace-UI
In this section we will look into the data provide by the sensors try to understand it and act accordingly.
Disclaimer
This part is still work in progress. In the end it should be possible to identify specific cars and also know what direction they are turned.
This part of the Article will mainly apply to my situation, you will have to adjust accordingly.
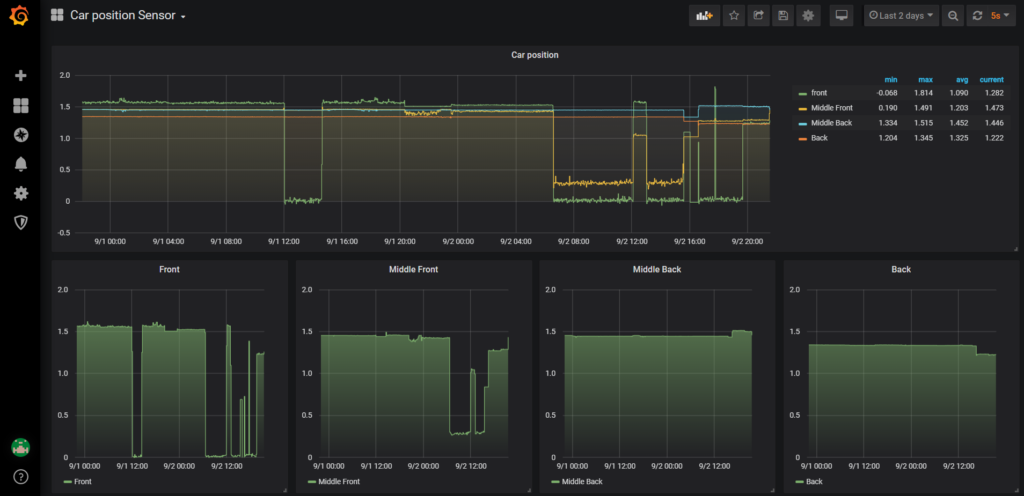
Getting the sensors in grafana will help us visualize what these values will look like
Installing InfluxDB / Grafana and reading data
In order to get nice graphs in grafana you need to have the data stored in a database. Here is where InfluxDB comes into play. We will get the values sent from ESPHome to Home Assistant , send them in InfluxDb and then pull them from in grafana.
I won’t explain that part since there is a nice video by frenck on how to do it. He’s doing it in a “speedrun” so you might consider slowing the video down by 0.75 or even 0.5. Grab some popcorn, sit back, relax and enjoy this nice little video.
Viewing the graphs
Now that the steps above are completed; I’ve prepared a json download that you can import in grafana in order to get the same view as provided in the image above.
You do need to keep the names like the ones in the example or you won’t get the data. You can easily fix that in case you aren’t getting value
Download the Json file to import in grafana
DOWNLOAD
Understanding the data and creating sensors in Home Assistant
Now comes the tricky part, understanding what you see and coming up with scenarios. For now i just want to know if a car is present under 2 sensors at once. Since each of my cars is higher than 50 cm I will create 3 template sensors based on that information.
Like mentioned above, right now we are only monitoring if there is a car or not. Withe the help of grafana and over time we will be able to exactly identify the cars and their orientation and adapt accordingly. For instance soon as I can work with the data I will be able to add different states than “on” and “off”. here is an example what it could look like for one sensor
The Lovelace Thing
Getting an animation in lovelace will require a little bit of tinkering from your part.
First of all you will need HACS (Home Assistant Community Store and you will have to install card-mod (can be installed via HACS)
In order to Have a views in lovelace, you will need to use the picture-elements card.
The following gist will illustrate an example of how this can look like in lovelace
like already explained at the beginning this applies mostly to my case and i am currently only detecting if there is a car or not. In future i will add more information as I go on.
Useful Information
In case of any question, find me on Discord or on Twitter.
You can find a dedicated Discord Server For any ESPHome related question or if you have questions about the drivers for the D1 mini
If you have issues with the community add-ons, you might find help on their discord server.
If you liked this article, do not hesitate to share it
I run mostly on coffee so, if you enjoy my work, and if you would like to support me you can buy me a coffee

Love it thanks! Definitely want to do more with esphome and hardware in general, so this is very helpful thanks.
Can’t help but wonder if the same could be achieved with a simple webcam and some image recognition though 😛
I am sure it could, and maybe I will try that in future since I have 2 cameras in the garage. Do you know a software that could do that ? I would be more than pleased to try it out. I’ve thought about beacons as well or RFID, but unfortunately I don’t know enough about that subject as of yet.
I’ve had all sorts of problems with these. I’m getting 1.12 cm no matter if my car is in the garage under the sensor or not. I’ve tried 3 different sensors and 3 different ESP boards and I’ve used Home Assistant and Tasmota. It’s the same with everything. I can’t understand what I’m doing wrong. I’m only using 2 sensors centered above each vehicle.
Enjoyed this post. Always like seeing new home assistant blogs
Thank you very much and welcome to the blog. Stay tuned I will try to post regularly.
Hi Adonno,
Nice witte-up! Like the way you tackled this challange. Wish I had a garage myself :-). But still inspirational for future other Projects.
Ralph
Hey Ralph
Thank you very much
Great post! Looking forward to learning a lot from you!
Hey John
Thank you i will try to post regularly. Like at least 1 article a month. I am already working on the next one. Will take some time for this one however
Adonno
Such an awesome project. I’d really like to see some photos of how you mounted the sensors in their final positions in the garage.
Can you please tell me the graphic interface , on what platform is made ?
Hey what do you mean, what platform ?
I am using Home-Asisstant. https://home-assistant.io
I guess what Cata wanted to know how you created the ground floor graphics with the animated car – which I would also be interested in! Is there a post on how you created your dashboard?
Thank you for a great tutorial; I am a newbie with Tasmota and now esphome. Lots to learn. About the car detector, many of us are using Blue Iris coupled with DeepStack. As of a few months?? ago, there is no longer a fee to use Deepstack!!. I don’t believe there is LPR (license plate reader) functionality yet, but ……. Again, thank you.
I would like to understant where you find this number 2.42 in filter?!?!?!
The height of my ceiling
Hey there! Any ideas if I might be able to use the ultrasonic distance sensor or perhaps there’s an inexpensive IR beam sensor I could connect to a D1 mini at the garage door whereby I could sense a car pulling into/out of the garage and then automatically close the door after a few seconds? The time it takes a car to pass the sensor versus a person would be much greater so it would close the door after the car but not the person…
Hi,
have you ever thought about building a “Tesla”-like sensor which is opening the garage door, when arriving at home. So in my case we have a carport and a garage. The garage door should only open, when the vehicle which is normally parking in the garage is arriving. And is closing, when you leave the garage with the vehicle .
Thanks for your answer.
Yeah i would like that too,
could be easily done with bluetooth or WLan
install an esp32 somewhere close to the garage and if your cars bluetooth connect to it , you could open the garage
or if your phone connects to the wlan ?
Hi, i just started discovering ESPHome. This article gave me a good start.
What I don’t get, is why connecting D4 would prevent the device to boot?
Can you explain this please ?
I’m trying to build a similar version of this project. The problem I’m running into is where I am going to place my D1 mini.
My project is only going to use 2 ultrasonic sensors.
I’ve been testing everything on a breadboard. I can only use a cable about 8″ long between the sensor and the D1 which will be fine for the first sensor but will not at all work for the sensor over car 2.
I’m using Cat-6 cable between the sensor and the D1.
Should I try something else?
I used a cat5 Cable and it worked my sensors are 3m apart (10feet) on one cable no issues
I must admit mine is currently offline due to me hanging a rack above the roof